
How to use Multisigs with CKB-CLI

This guide is the first of a series from Obsidian Systems on how to construct different types of transactions with Nervos' client, CKB-CLI. Here we'll cover multisigs - what they are, how to make them, and how to construct a transfer from them. We'll also demonstrate a few methods to confirm our transaction succeeded.
Later in this series we'll also be publishing guides on topics like timelock addresses and transactions with multiple outputs.
This guide was made with git hash b2c35a486ec766008acfea778a4d33c87acf2724 of CKB-CLI and is based on this guide for Handling Complex Transactions. Let's get started!
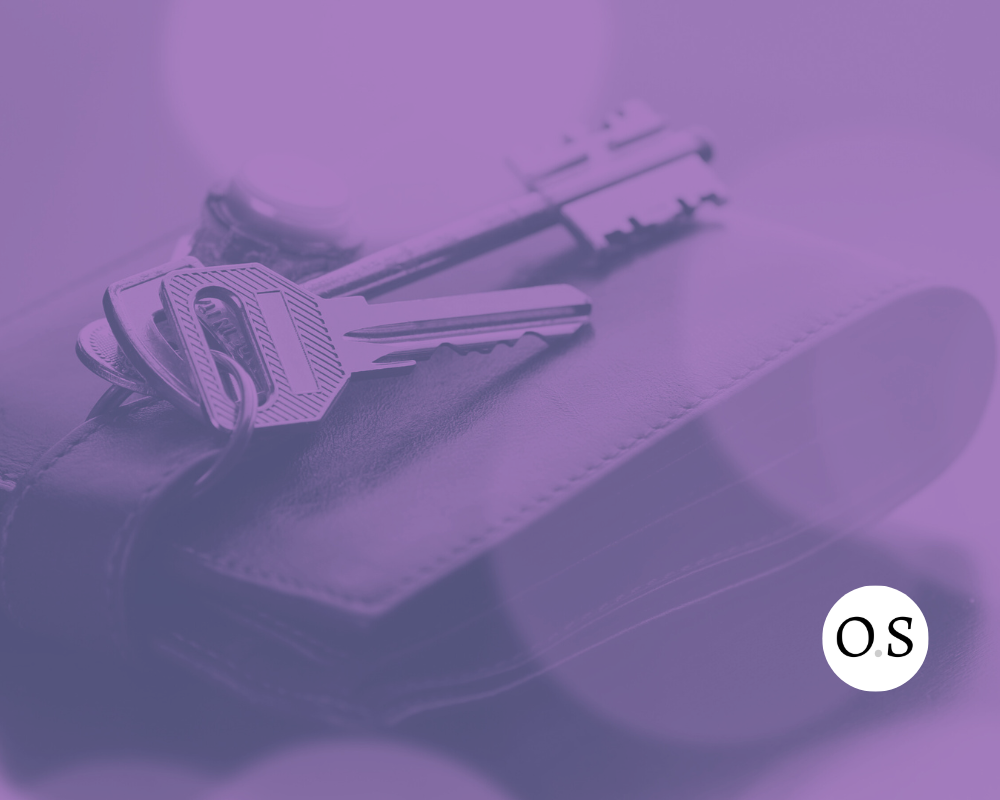
Real-world multi-key solutions! (Photo Credit)
About Multisig Addresses
A multisig address is a Nervos address that requires the signatures of one or multiple keys based on the requirements established when the address was created. It generally includes all signing schemes that don't only require a single signature, although that is also possible! For instance, you can require that every signer (ex. 3 of 3) sign for a transaction to be valid. Or, you can set it so only one of many signatures (ex. 1 of 3) is needed to sign a transaction. Or, you can only require a single signature (ex. 1 of 1).
Let's look at the command used to create a multisig address to understand these options better:
CKB> tx build-multisig-address --help

tx-build-multisig-address

Build multisig address with multisig config and since(optional) argument

USAGE:
     tx build-multisig-address [OPTIONS] --sighash-address <sighash-address>...

FLAGS:
     -h, --help Prints help information

OPTIONS:
     --sighash-address <sighash-address>... Normal sighash address
     --require-first-n <require-first-n> Require first n signatures of corresponding pubkey [default: 0]
     --threshold <threshold> Multisig threshold [default: 1]
     --since-absolute-epoch <since-absolute-epoch> Since absolute epoch number
Looking at the different options we have:
--sighash-addressis where we list any addresses that should be able to sign for this multisig. These can be listed in order separated by a space with as many addresses as we choose.--require-first-nsets a requirement that some signatures of the set must sign for the multisig for the signature to be valid. This is most useful when combined with threshold.--thresholdsets how many of our potential signers (provided with--sighash-address) are necessary to produce the multisig addresses' signature. For instance, if we have 6 total addresses with a threshold of 4, then 4 of those 6 signatures are necessary to sign for the multisig address.--since-absolute-epochprevents the cells held at this address from being spent before a given time, defined by the absolute epoch when they unlock. For more information on setting restrictions on when a cell's can be spent, see RFC17: Transaction valid since (as use with caution so you don't accidentally lock your funds for longer than you wanted!).
This small set of features can create many different configurations to suit an application's needs!
Getting Set Up
We are going to create a multisig address with 2 signers, both of which are required (threshold = 2). Note that this means you'll need the keys to both addresses locally if you'd like to follow along. You may first want to run account list to see how many accounts you have set up:
CKB> account list

- “#”: 0
  address:
     mainnet: ckb1qyqv8256ceslzzp72rxfz5wutpsfk35jzdas5tn693
     testnet: ckt1qyqv8256ceslzzp72rxfz5wutpsfk35jzdasfwd9fd
  lock_arg: 0xc3aa9ac661f1083e50cc9151dc58609b4692137b
  lock_hash: 0x386815b600bc6064b9333105a331af34c376ed60264e14fc6f4717889bcf58ec
- “#”: 1
  address:
     mainnet: ckb1qyqru2kkvk3vk35k607y5gtsglwjtccdw0xsdhhzuv
     testnet: ckt1qyqru2kkvk3vk35k607y5gtsglwjtccdw0xssjfass
  lock_arg: 0x3e2ad665a2cb4696d3fc4a217047dd25e30d73cd
  lock_hash: 0x47e22ab140292a7bc7aa4959e049fd138b60e2e9a38921df27f44cdc761de50e
If you need additional accounts (you might want a 3rd for your destination), just run account new until you have enough.
You will also need funds on at least one of these accounts. If you'd like to do this on a local devnet, follow this Dev Chain guide. If you are using Aggron, you can get CKB from the faucet.
Remember - since both of these are considered 'testnet', we'll use testnet addresses throughout the guide - not mainnet addresses.
Create and Fund the Multisig Address
The first step is to create the multisig address with the command we detailed above:
tx build-multisig-address --sighash-address <sighash-address>...
For --sighash-address we will list all the 2 addresses we want to sign for this multisig account. We also want all signatures to be required, so we'll set the optional threshold parameter equal to the number of sighash addresses:
CKB> tx build-multisig-address --sighash-address ckt1qyqv8256ceslzzp72rxfz5wutpsfk35jzdasfwd9fd ckt1qyqru2kkvk3vk35k607y5gtsglwjtccdw0xssjfass --threshold 2


lock-arg: 0x74573da67951f1192dccbf76bfea95b5766009a4
lock-hash: 0x2de9aac553771d51d865f9862cf6bcb0f7d00913fdd10cda9f6525a1be6fd95b
mainnet: ckb1qyqhg4ea5eu4ruge9hxt7a4la22m2anqpxjq3ty9au
testnet: ckt1qyqhg4ea5eu4ruge9hxt7a4la22m2anqpxjqvw663q
As the output shows, the testnet multisig address we created is ckt1qyqhg4ea5eu4ruge9hxt7a4la22m2anqpxjqvw663q.
The address is created with a balance of 0, so we'll now have to fund it. We can do this with the wallet transfer subcommand, which we'll use to send funds from one of our two accounts:
CKB> wallet transfer --from-account 0xc3aa9ac661f1083e50cc9151dc58609b4692137b --to-address ckt1qyqhg4ea5eu4ruge9hxt7a4la22m2anqpxjqvw663q --capacity 500 --tx-fee 0.0001

Password:

0x7645a048504fcf495a2c42a0c8387e7be52c048ae1172b554daf272e29c89af8
After entering our password, we get the transaction hash returned by the client. (Note: if you are using a local dev chain, remember to run your miner now so the operation gets included in a block!) We can confirm this operation succeeded by looking at the live cells of our multisig address:
CKB> wallet get-live-cells --address ckt1qyqhg4ea5eu4ruge9hxt7a4la22m2anqpxjqvw663q

current_capacity: 500.0 (CKB)
current_count: 1
live_cells:
     - capacity: 500.0 (CKB)
       data_bytes: 0
       index:
          output_index: 0
          tx_index: 1
       lock_hash: 0x2de9aac553771d51d865f9862cf6bcb0f7d00913fdd10cda9f6525a1be6fd95b
       mature: true
       number: 1054
       tx_hash: 0x7645a048504fcf495a2c42a0c8387e7be52c048ae1172b554daf272e29c89af8
       tx_index: 0
       type_hashes: ~
total_capacity: 500.0 (CKB)
total_count: 1
(Interested in learning more about cells and Nervos' Cell Model? Here is the documentation and a helpful Medium Post).
This multisig address is now created and funded with 500 CKB!
Transferring from the Multisig
Transferring from a multisig is different than transferring from a normal address. Instead of using the wallet transfer subcommand, we are going to use CKB-CLI to create a JSON file which we'll populate with the inputs, outputs, and signatures we'd like until the transaction is fully formed.
First, let's decide what to call our transaction file and create it. 'multisig.json' seems good:
CKB> tx init --tx-file multisig.json

status: success
Let's now populate it with the elements that form this transaction. We'll start by telling it the signatures we'll be providing with the following command:
tx add-multisig-config \[OPTIONS\] --sighash-address <sighash-address>... --tx-file <tx-file>
In our case we want to set the threshold to 2 as well because we need signatures from both sighash addresses. Note that we're not deciding we want both signatures now (that was decided when we made the multisig address), we're just telling the transaction what it should expect:
CKB> tx add-multisig-config --sighash-address ckt1qyqv8256ceslzzp72rxfz5wutpsfk35jzdasfwd9fd ckt1qyqru2kkvk3vk35k607y5gtsglwjtccdw0xssjfass --threshold 2 --tx-file multisig.json

status: success
The transaction file is now set up to expect signatures from both addresses, which is required by the input cell owned by our multisig address. Let's now add that input cell owned by our multisig address to this transaction with this command:
tx add-input --tx-hash <tx-hash> --index <index> --tx-file <tx-file>
We can get both tx-hash and index from the result of tx get-live-cells which we ran earlier:
CKB> tx add-input --tx-hash 0x7645a048504fcf495a2c42a0c8387e7be52c048ae1172b554daf272e29c89af8 --index 0 --tx-file multisig.json

status: success
Now we need to tell the transaction file where to send CKB from the multisig. The capacity of the output must be less than the capacity of the input with enough CKB to spare to pay the transaction fee. If no change output is added, any CKB inputs not sent to outputs are considered fees paid to the miner. By default, fees of over 1 CKB are not allowed to prevent accidentally sending too much fee to the miner, but this is also configurable. Let's send 400 CKB, pay a fee of 0.001 CKB, and send the rest back to one of our accounts as change. We'll use this command to set the outputs:
tx add-output [OPTIONS] --capacity <capacity> --tx-file <tx-file>
There are a few ways to set the destination of these funds, so none of them are listed as defaults. They are:
--to-sighash-address <to-sighash-address>
          To normal sighash address
--to-short-multisig-address <to-short-multisig-address>
          To short multisig address
--to-long-multisig-address <to-long-multisig-address>
          To long multisig address (special case, include since)
Our destination is a normal sighash address, so we'll use the first option:
CKB> tx add-output --to-sighash-address ckt1qyq9x0frsy76j2ynf2taay4ssy85x76vm4kszxshna --capacity 400 --tx-file multisig.json

status: success
We've now created our transaction file, set the signing requirement, added an input, and added an output. Now seems like a fine time to check the status of our transaction file with tx info --tx-file <tx-file>. This is a helpful command you can use at any time to check the state of our JSON file:
CKB> tx info --tx-file multisig.json

[input] ckt1qyqhg4ea5eu4ruge9hxt7a4la22m2anqpxjqvw663q => 500.0, (data-length: 0, type-script: none, lock-kind: multisig without since)
[output] ckt1qyq9x0frsy76j2ynf2taay4ssy85x76vm4kszxshna => 400.0, (data-length: 0, type-script: none, lock-kind: sighash(secp))
input_total: 500.0 (CKB)
output_total: 400.0 (CKB)
tx_fee: 100.0 (CKB)
As expected, we see our input cell with a capacity of 500 CKB and an output of 400 CKB to the destination we set. The transaction fee is currently 100 CKB as we haven't yet told the transaction where to send our change. Let's do that next.
First, we'll need a change address associated with one of our accounts:
CKB> account extended-address --lock-arg 0xc3aa9ac661f1083e50cc9151dc58609b4692137b --path “m/44'/309'/0'/1/0”

Password:

address:
  mainnet: ckb1qyqtgsg6n2u2qrr4hrsm7993dmddu898ldfs6xv5w6
  testnet: ckt1qyqtgsg6n2u2qrr4hrsm7993dmddu898ldfs8rjtzx
lock_arg: 0xb4411a9ab8a00c75b8e1bf14b16edade1ca7fb53
Now let's create an output cell for that address so that only 0.001 CKB remains as the transaction fee:
CKB> tx add-output --to-sighash-address ckt1qyqtgsg6n2u2qrr4hrsm7993dmddu898ldfs8rjtzx --capacity 99.999 --tx-file multisig.json

Status: success
Let's make sure we have our transaction fee correct now:
CKB> tx info - tx-file multisig.json

[input] ckt1qyqhg4ea5eu4ruge9hxt7a4la22m2anqpxjqvw663q => 500.0, (data-length: 0, type-script: none, lock-kind: multisig without since)
[output] ckt1qyq9x0frsy76j2ynf2taay4ssy85x76vm4kszxshna => 400.0, (data-length: 0, type-script: none, lock-kind: sighash(secp))
[output] ckt1qyqtgsg6n2u2qrr4hrsm7993dmddu898ldfs8rjtzx => 99.999, (data-length: 0, type-script: none, lock-kind: sighash(secp))
input_total: 500.0 (CKB)
output_total: 499.999 (CKB)
tx_fee: 0.001 (CKB)
Looks great! With our transaction properly constructed, it's now time to sign it and add the signatures.
Signing the Transaction
Now that we know the transaction is finalized, it's time to sign it with each signature. Note that we aren't signing with the multisig address, we are signing with each account that makes up the multisig. We'll need as many signatures as we set the threshold to when creating our multisig, which in this case is two. Here's the operation to sign:
tx sign-inputs --from-account <from-account> --tx-file <tx-file>
Let's use it to sign with our first account:
CKB> tx sign-inputs --from-account 0xc3aa9ac661f1083e50cc9151dc58609b4692137b --tx-file multisig.json

Password:

- lock-arg: 0x74573da67951f1192dccbf76bfea95b5766009a4
  signature: 0x9afd86f6ac3022bbab1b6c05743f6a647005d91b358d78decff9ffa6b5f860692e04a655c21bd9bcd54cd02380eaa105667ed4d70659ccaeef74f08ccd313be000
After entering our password for that account, the operation's response gives us a lock-arg and a signature associated with it. Notice the lock-arg in the response is not the lock-arg provided in the --from-account field - it is the lock-arg of our multisig! Just like inputs and outputs, this signature also needs to be added to our transaction file. Here's the command:
tx add-signature --lock-arg <lock-arg> --signature <signature> --tx-file <tx-file>
For both --lock-arg and --signature we can use the response from our previous command. --tx-file is the same we've used up until this point:
CKB> tx add-signature --lock-arg 0x74573da67951f1192dccbf76bfea95b5766009a4 --signature 0x9afd86f6ac3022bbab1b6c05743f6a647005d91b358d78decff9ffa6b5f860692e04a655c21bd9bcd54cd02380eaa105667ed4d70659ccaeef74f08ccd313be000 --tx-file multisig.json

status: success
Excellent! That first signature is added. Let's now add the second signature. However, this time let's condense the two-step process of signing and adding the signature to the JSON file into one step using the--add-signatures option for tx sign-intputs:
CKB> tx sign-inputs --from-account 0x3e2ad665a2cb4696d3fc4a217047dd25e30d73cd --tx-file multisig.json --add-signatures

Password:

- lock-arg: 0x74573da67951f1192dccbf76bfea95b5766009a4
  signature: 0x3ee146e3f8386c005e8a921a97b1bbf126346e1d07f36b8aec340de64d0f90a17be4c4eae9fd083113846d47373583bdae89817e1b4f250c8950c1da9c5f8b8d00
Great! With both signatures added, this operation should be ready to go. Let's do one final check to make sure our inputs are signed:
CKB> tx info - tx-file multisig.json

[input(signed)] ckt1qyqhg4ea5eu4ruge9hxt7a4la22m2anqpxjqvw663q => 500.0, (data-length: 0, type-script: none, lock-kind: multisig without since)
[output] ckt1qyq9x0frsy76j2ynf2taay4ssy85x76vm4kszxshna => 400.0, (data-length: 0, type-script: none, lock-kind: sighash(secp))
[output] ckt1qyqtgsg6n2u2qrr4hrsm7993dmddu898ldfs8rjtzx => 99.999, (data-length: 0, type-script: none, lock-kind: sighash(secp))
input_total: 500.0 (CKB)
output_total: 499.999 (CKB)
tx_fee: 0.001 (CKB)
This operation is ready to be sent to the node!
Submitting the Transaction to the Node
With our transaction JSON file finalized, all that's left is submitting it to the blockchain. It will then be included in a block and reflected in the network's state.
CKB> tx send --tx-file multisig.json

0x8d3bf4eb2d61408241092e451cff375b188b709e34ea77e56e4d44e81d150700
Confirming the Transaction
Our operation has been submitted to the chain! Let's make sure it actually happened. There are a few ways we can do this, but let's start by just looking at the transaction itself:
CKB> rpc get_transaction --hash 0x8d3bf4eb2d61408241092e451cff375b188b709e34ea77e56e4d44e81d150700

transaction:
  cell_deps:
     - dep_type: dep_group
       out_point:
         index: 1
         tx_hash: 0x10212028a561ca990f0cc007ca7f1e3e7c6bbf0aa9a68f5a47ec47c01b4cf38a
  hash: 0x8d3bf4eb2d61408241092e451cff375b188b709e34ea77e56e4d44e81d150700
  header_deps: []
  inputs:
    - previous_output:
        index: 0
        tx_hash: 0x7645a048504fcf495a2c42a0c8387e7be52c048ae1172b554daf272e29c89af8
      since: 0x0 (absolute block(0))
  outputs:
    - capacity: “400.0”
      lock:
        args: 0x533d23813da928934a97de92b0810f437b4cdd6d
        code_hash: 0x9bd7e06f3ecf4be0f2fcd2188b23f1b9fcc88e5d4b65a8637b17723bbda3cce8 (sighash)
        hash_type: type
      type: ~
    - capacity: “99.999”
      lock:
        args: 0xb4411a9ab8a00c75b8e1bf14b16edade1ca7fb53
        code_hash: 0x9bd7e06f3ecf4be0f2fcd2188b23f1b9fcc88e5d4b65a8637b17723bbda3cce8 (sighash)
        hash_type: type
      type: ~
  outputs_data:
    - 0x
    - 0x
  version: 0
  witnesses:
    -
0xc200000010000000c2000000c2000000ae00000000000202c3aa9ac661f1083e50cc9151dc58609b4692137b3e2ad665a2cb4696d3fc4a217047dd25e30d73cd3ee146e3f8386c005e8a921a97b1bbf126346e1d07f36b8aec340de64d0f90a17be4c4eae9fd083113846d47373583bdae89817e1b4f250c8950c1da9c5f8b8d009afd86f6ac3022bbab1b6c05743f6a647005d91b358d78decff9ffa6b5f860692e04a655c21bd9bcd54cd02380eaa105667ed4d70659ccaeef74f08ccd313be000

tx_status:
  block_hash: 0x003b6b86e725d94256fa618a7bb794e04eae687e1d25ac75638989754b89ca3a
  status: committed
These transaction details show us the two output cells we expected: the first for 400 CKB which is now owned by the lock-arg associated with the--to-address we set (ckt1qyq9x0frsy76j2ynf2taay4ssy85x76vm4kszxshna). The second is for 99.999 CKB to on of our change addresses (ckt1qyqtgsg6n2u2qrr4hrsm7993dmddu898ldfs8rjtzx) which is owned by the lock-arg of this extended-address (0xb4411a9ab8a00c75b8e1bf14b16edade1ca7fb53).
Balance checks on any of the addresses or lock-args also confirm things we exactly as we intended:
CKB> wallet get-capacity --lock-arg 0x533d23813da928934a97de92b0810f437b4cdd6d

total: 400.0 (CKB)

CKB> wallet get-capacity --address ckt1qyqtgsg6n2u2qrr4hrsm7993dmddu898ldfs8rjtzx

total: 99.999 (CKB)
That's it! See below for the final contents of the multisig.json file we created during this guide.
Final File Contents - multisig.json
{
  "transaction": {
    "version": "0x0",
    "cell_deps": [
       {
         "out_point": {
           "tx_hash": "0x10212028a561ca990f0cc007ca7f1e3e7c6bbf0aa9a68f5a47ec47c01b4cf38a",
           "index": "0x1"
         },
         "dep_type": "dep_group"
       }     ],
     "header_deps": [],
     "inputs": [
       {
         "since": "0x0",
         "previous_output": {
           "tx_hash": "0x7645a048504fcf495a2c42a0c8387e7be52c048ae1172b554daf272e29c89af8",
           "index": "0x0"
         }
       }
     ],
     "outputs": [
       {
         "capacity": "0x9502f9000",
         "lock": {
           "code_hash": "0x9bd7e06f3ecf4be0f2fcd2188b23f1b9fcc88e5d4b65a8637b17723bbda3cce8",
           "hash_type": "type",
           "args": "0x533d23813da928934a97de92b0810f437b4cdd6d"
         },
         "type": null
       },
       {
         "capacity": "0x2540a5d60",
         "lock": {
           "code_hash": "0x9bd7e06f3ecf4be0f2fcd2188b23f1b9fcc88e5d4b65a8637b17723bbda3cce8",
           "hash_type": "type",
           "args": "0xb4411a9ab8a00c75b8e1bf14b16edade1ca7fb53"
         },
         "type": null
       }
     ],
     "outputs_data": [
       "0x",
       "0x"
     ],
     "witnesses": []   },
   "multisig_configs": {
     "0x74573da67951f1192dccbf76bfea95b5766009a4": {
       "sighash_addresses": [
         "ckt1qyqv8256ceslzzp72rxfz5wutpsfk35jzdasfwd9fd",
         "ckt1qyqru2kkvk3vk35k607y5gtsglwjtccdw0xssjfass"
       ],
       "require_first_n": 0,
       "threshold": 2
     }
   },
   "signatures": {
     "0x74573da67951f1192dccbf76bfea95b5766009a4": [
      "0x3ee146e3f8386c005e8a921a97b1bbf126346e1d07f36b8aec340de64d0f90a17be4c4eae9fd083113846d47373583bdae89817e1b4f250c8950c1da9c5f8b8d00",
       "0x9afd86f6ac3022bbab1b6c05743f6a647005d91b358d78decff9ffa6b5f860692e04a655c21bd9bcd54cd02380eaa105667ed4d70659ccaeef74f08ccd313be000"
     ]
   }
 }
Please stay tune for other guides covering how to do transactions with CKB-CLI!
Interested in learning more about our Nervos development? Follow us on Twitter!
We'd like to thank Nervos for their support as we develop a Ledger application for Nervos and add hardware wallet support to CKB-CLI.